Is the TranzAlpine Train Worth It? We Did the Full Return Journey From Christchurch to Greymouth
Disclosure: This was part of a sponsored trip with Great Journeys of New Zealand, but we’re giving you the unfiltered version, including what we’d change if we paid full price.
We spent 9 hours on the TranzAlpine train, Christchurch to Greymouth and back in one day, and honestly, we weren’t sure if it would be worth NZD 518 return. Turns out, it was. But not for the reasons we expected.
The TranzAlpine crosses 223 kilometres from the Canterbury Plains through the Southern Alps into the wild West Coast. Some sections, the Otira Tunnel, the Waimakariri Gorge, and parts of the alpine descent, are only accessible by train. You can’t drive there. You can’t hike there. That’s what makes this different from just another scenic journey.
But is it worth it? Depends. If you’re short on time, love slow travel, or need a rest day that still feels special, yes. If you’re already driving the West Coast or watching your budget closely, probably not. Here’s everything you need to decide.
When the TranzAlpine IS Worth It (And When to Skip It)
Look, the TranzAlpine isn’t cheap. At NZD 518 return, it’s one of those expenses you’ll debate over while planning your New Zealand trip. But here’s when it actually makes sense.
If you’re visiting New Zealand for just a week or two and can’t afford the time to drive the entire West Coast, this train gives you a solid taste of the South Island’s best landscapes without committing to days behind the wheel. You’ll cross the Canterbury Plains, climb through the Southern Alps, and drop into the wild West Coast in under five hours. It’s efficient, but it still feels special.
The TranzAlpine also works as a rest day. If you’ve just finished a multi-day hike or you’re between glacier treks and bungy jumps, nine hours on a train watching mountains is exactly the kind of low-effort day that keeps you from burning out. You’re still seeing New Zealand, just from a seat with a glass of wine.
If you love train journeys and slow travel, this is worth it. There’s something about trains, the rhythm, the way the landscape unfolds without you having to navigate or worry about where to stop. You just sit, watch, and take it in.
Here’s the big one, though. The Otira Tunnel section, the Waimakariri Gorge, and parts of the West Coast descent are literally only accessible by train. You can’t drive there. You can’t hike there. The only way to see these landscapes is from this train. If you care about seeing places most travellers miss, that alone justifies the cost.
Winter travellers, this one’s for you. If you’re visiting between June and August and you’re not confident driving mountain roads in snow and ice, the TranzAlpine is your safest way to experience the Southern Alps. The train runs year-round, and watching snow-covered peaks from a heated carriage while someone else handles the logistics makes sense.
And if you’re considering the return journey like we did, golden hour on the way back is beautiful. The light shifts, the train empties out after Arthur’s Pass, and you get a completely different feel on the same route. It doesn’t feel repetitive throughout the way.
Ready to book? Check current TranzAlpine prices and availability here.
When to Skip the TranzAlpine (Save Your Money)
Not everyone needs to do this, and if you’re stretching your budget or short on time, there are better ways to spend your money in New Zealand.
If you’re already planning to drive the West Coast from Greymouth down to Franz Josef and beyond, skip the train. The highway covers similar terrain, rainforest, river valleys, and mountain views, and you’ll have the freedom to stop wherever you want. The train gives you access to the Otira Tunnel and certain gorges you can’t reach by car, but if you’re doing the full West Coast road trip anyway, that trade-off isn’t worth NZD 518.
If you’re on a tight budget and only have a week in New Zealand, prioritise experiences you can’t replicate anywhere else. Franz Josef Glacier, Milford Sound, or a multi-day hike will give you more value than a train ride, no matter how scenic. The TranzAlpine is beautiful, but it’s passive. If you’re choosing between this and an active adventure, choose the adventure.
If sitting still for nine hours sounds awful, this isn’t for you. Yes, there’s an open-air viewing carriage, and you can move between carriages, but you’re still on a train for most of the day. Some people love that. Others get restless. Know yourself before you book.
Motion sickness is real, and even with a forward-facing seat, the train’s movement through curves and tunnels can trigger it. If you struggle with this on buses or ferries, the TranzAlpine might not be pleasant. Medication helps, but if you’re prone to severe nausea, save yourself the trouble.
Weather matters more than you’d think. If the forecast shows heavy rain or thick cloud, your visibility drops to almost nothing. The West Coast is naturally misty, which can look atmospheric, but if you’re staring at fog for four hours, you’ll feel like you wasted your money. Check MetService before you commit, and if it’s looking bad, consider rescheduling or skipping it.
Now that you know whether this is for you, here’s what the actual experience is like.

Scenic vs Scenic Plus: Which Should You Book?
When you book the TranzAlpine, you’ll choose between two ticket types: Scenic and Scenic Plus. The price difference is significant, double, actually, so here’s what you’re paying for.
What’s Included in Scenic
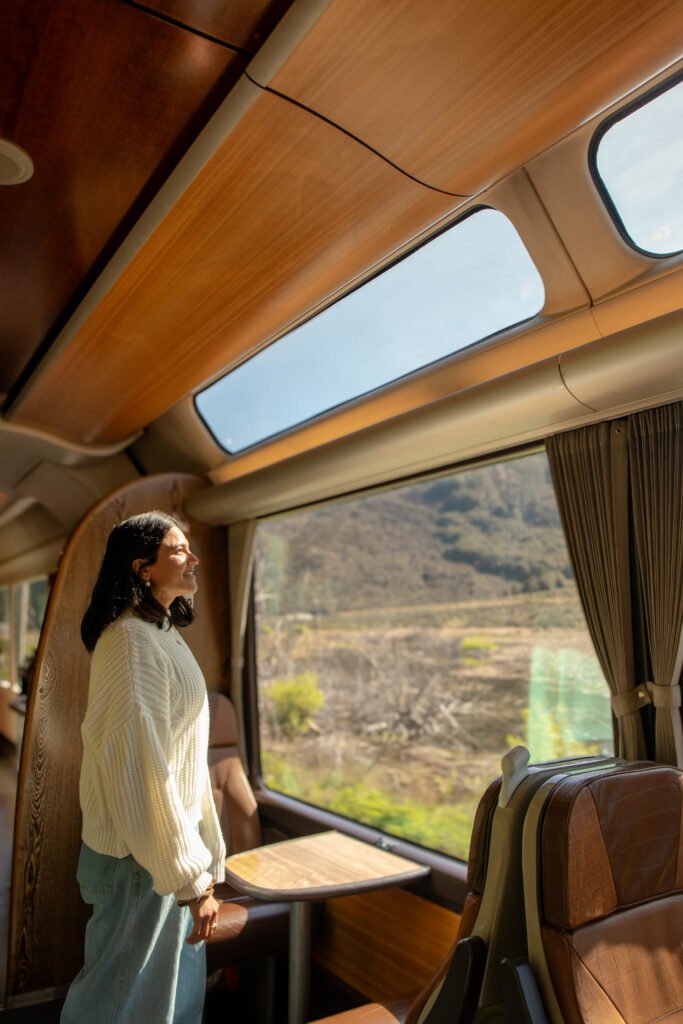
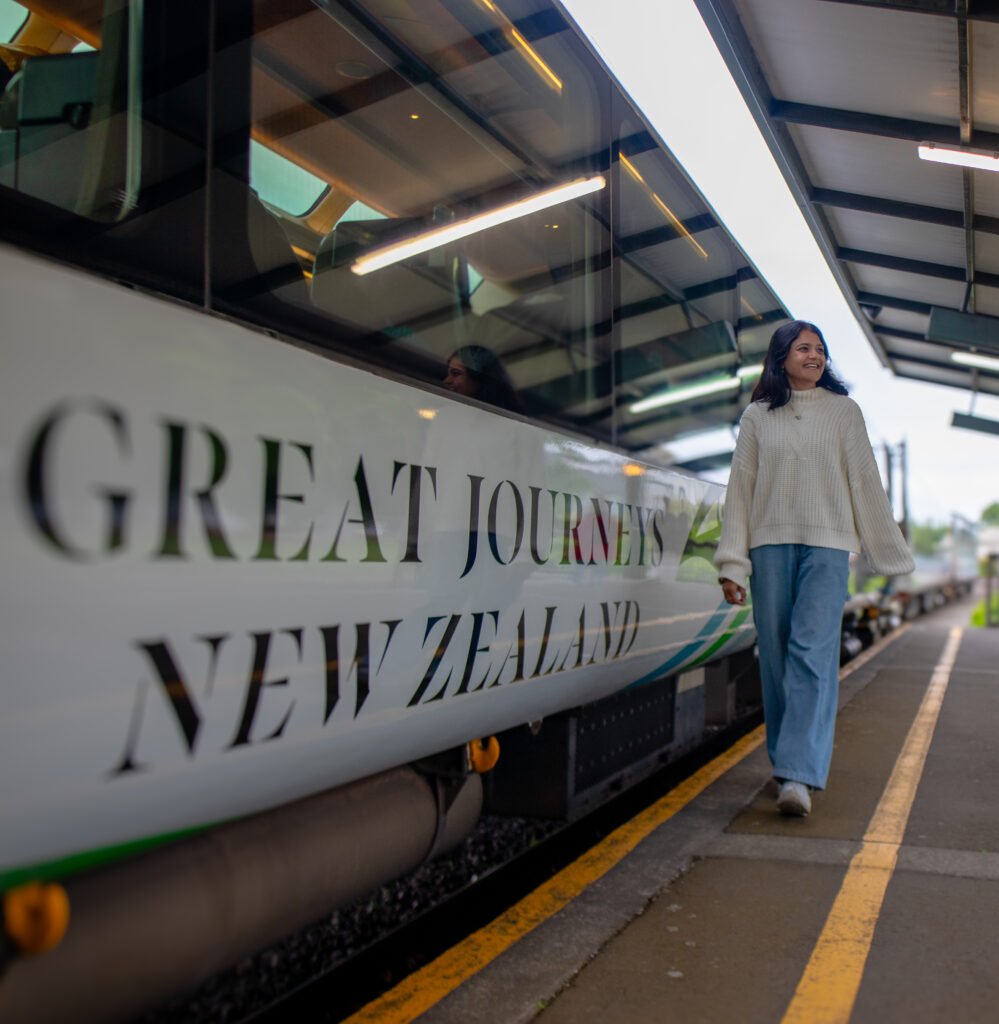
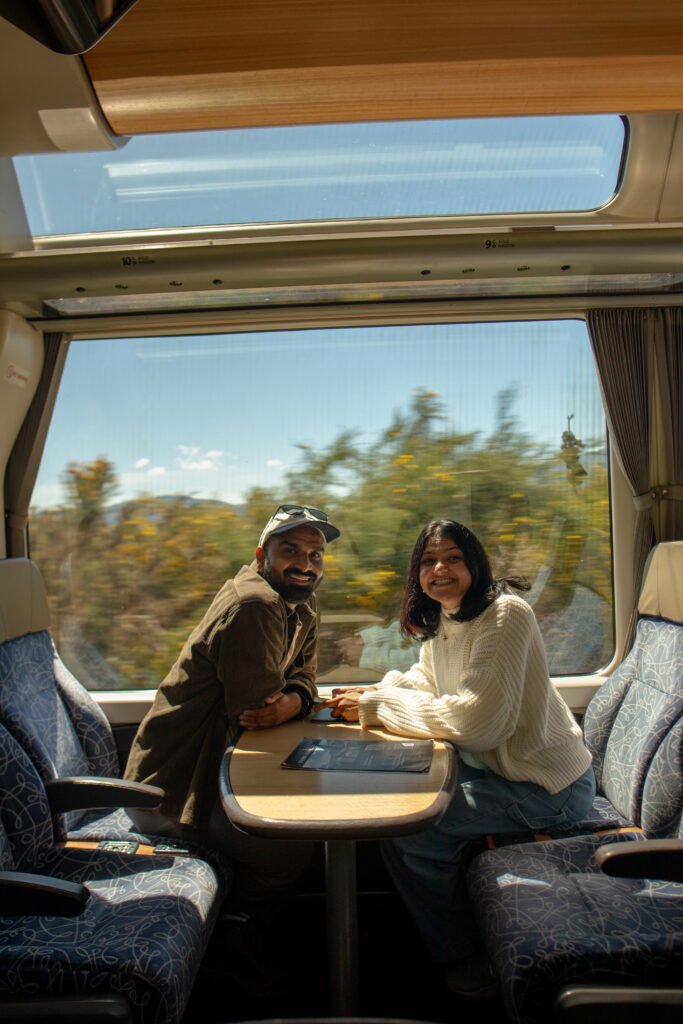
Scenic is the standard ticket, and it’s what we did. You get a seat with panoramic windows, decent legroom, and a reclining function that works fine for the full journey. There’s an open-air viewing carriage where you can step outside and feel the mountain air, and you have full access to the onboard café for food and drinks. Seats are allocated at check-in, not when you book, so if you want the right-hand side for better views heading west, arrive early and request it.
As of early 2026, Scenic starts at NZD 259 one-way or NZD 518 return. It’s expensive, but for train-only access to some of New Zealand’s best landscapes, it’s reasonable.
What’s Included in Scenic Plus
Scenic Plus is the luxury option. You get a more private cabin-style seat with extra space, a seasonal three-course meal served at your table, and complimentary drinks throughout, wine, beer, soft drinks, tea, and coffee. You still get the open-air viewing carriage, but the main difference is the food and the quieter atmosphere.
Scenic Plus starts at NZD 519 one-way or NZD 1,038 return. That’s over a thousand dollars for a day trip, which is hard to justify unless you’re celebrating something or you really value premium experiences.
Our Take: Is Scenic Plus Worth the Upgrade?
We did Scenic, and we didn’t feel like we missed out. The views are identical. The open-air carriage is the same. The only real difference is the meal service and seating, and honestly, the café food in Scenic is fine. We packed our own lunch from Christchurch, saved about NZD 30 each, and still bought coffee and wine onboard when we felt like it.
Scenic Plus might be worth it if you don’t want to move around much, you want food and drinks brought to your seat, or you’re doing this as a special occasion and the extra comfort justifies the cost. It’s also quieter, less chaotic, especially during peak season.
Skip Scenic Plus if you’re happy packing your own snacks, you want the flexibility to wander between carriages, or you’d rather spend that extra NZD 520 on another New Zealand experience, like a glacier heli-hike or a few extra days on the West Coast. The core experience is the same. You’re just paying for convenience and atmosphere, not better views.
Compare Scenic and Scenic Plus prices and book here.
From Otira, the train glides along deep river valleys and through dense native forest. We passed small towns like Moana, which sits beside Lake Brunner, a mirror of the surrounding hills.
Photo moment: Keep your camera ready as the train snakes through Jacksons and Inchbonnie, two of the best curve-shot spots on the route.
We reached Greymouth around 1:15 p.m. The town was quiet, with a few cafés and shops near the station.
The Journey: What to Expect Section by Section
The TranzAlpine doesn’t just take you from A to B. It crosses landscapes that shift every 30 minutes, flat farmland to deep gorges to rainforest valleys you can’t reach by road. Here’s what you’ll see, broken down by section, so you know what to expect and when to have your camera ready.
Christchurch to Springfield (First 40 Minutes)
The first 40 minutes out of Christchurch are industrial and, honestly, a bit boring. You’ll pass warehouses, suburban sprawl, and not much else. Don’t expect postcard views yet.
Use this time to get sorted. Grab a coffee from the café carriage, find the open-air viewing platform so you know where it is later, and use the bathroom before it gets crowded. The good stuff is coming.
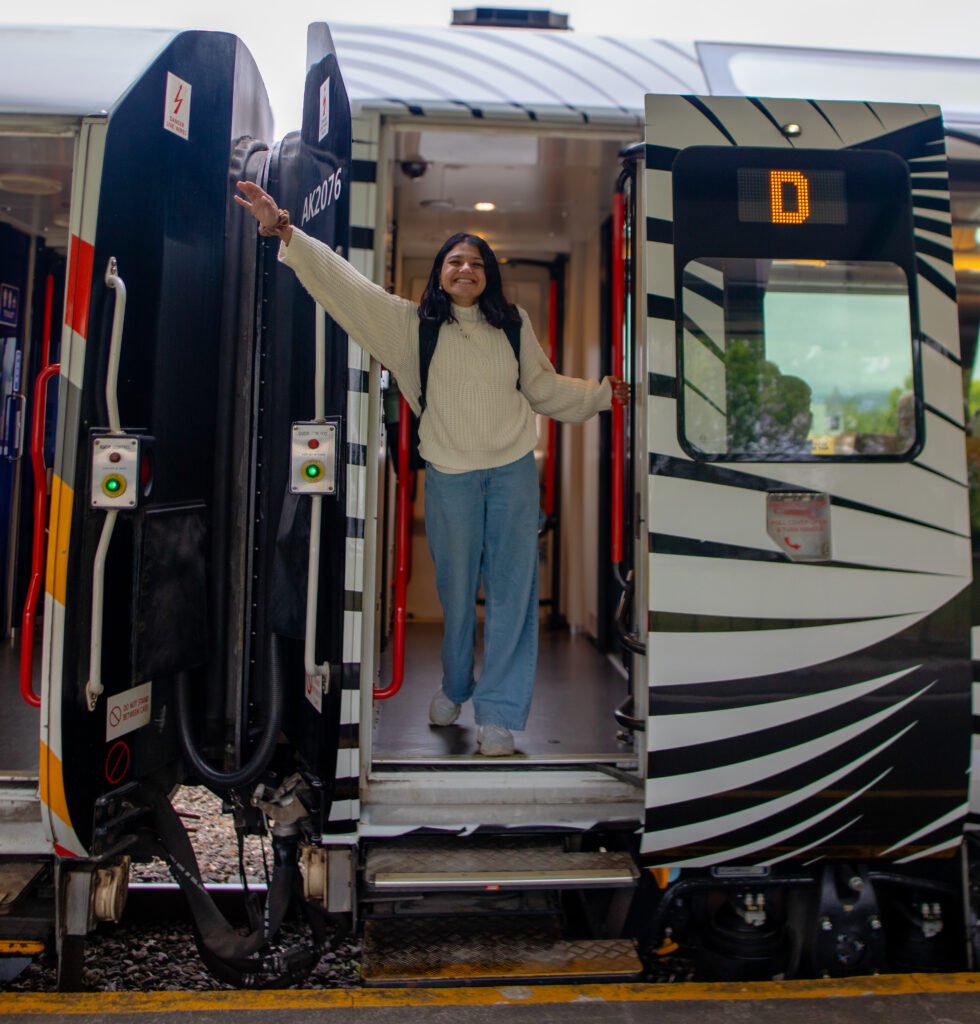
One thing: arrive at Addington Station at least 15 minutes early. It’s about 3 km from Christchurch’s city center, and seats are allocated at check-in, not when you book. If you want the right-hand side for better views heading west, you need to ask for it then. We did, and it helped, though after Arthur’s Pass the train empties out anyway and you can move around freely.
Springfield to Arthur’s Pass (The Canterbury Plains & Alpine Climb)
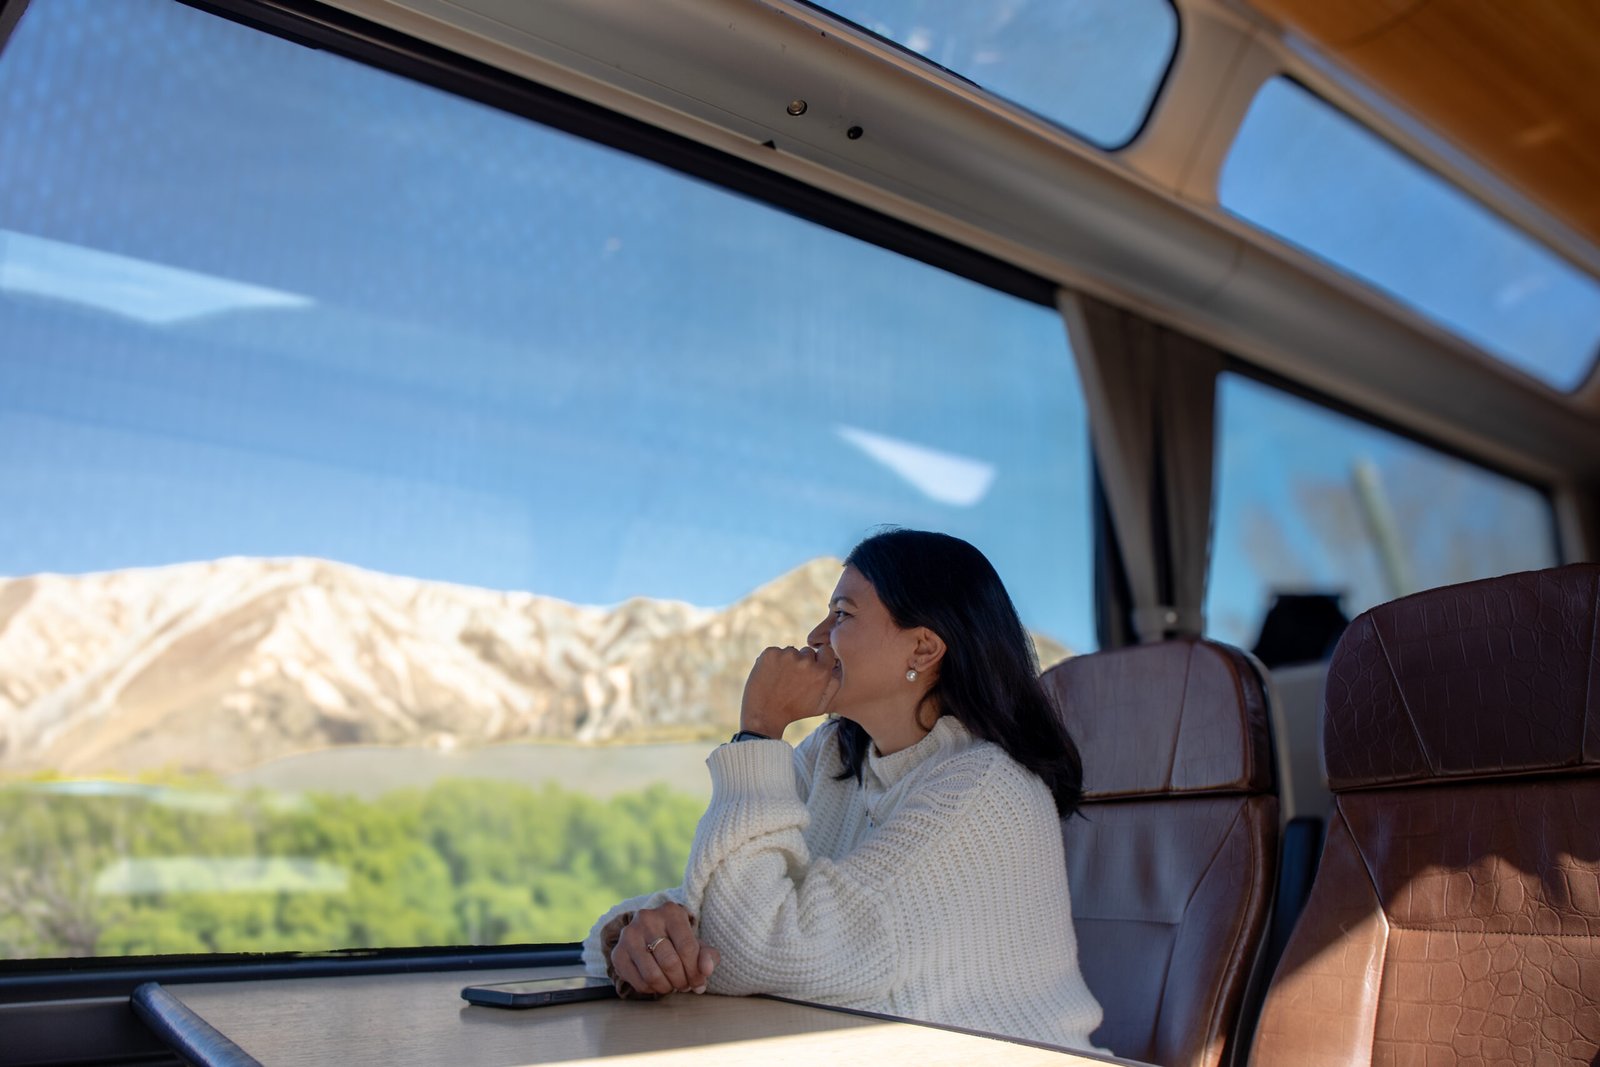
This is where it gets good. Once you pass Springfield, the Canterbury Plains open up with the Southern Alps rising in the distance, snow-dusted and sharp. The train starts climbing, and you’ll cross the Waimakariri River Gorge via the 73-meter-high Staircase Viaduct. It’s one of those moments where everyone in the carriage leans toward the windows.
Keep your camera ready. The light changes fast, especially in the morning, and this section is some of the best shooting you’ll get on the entire journey.
Arthur’s Pass (The Turning Point)
The train stops at Arthur’s Pass for about 10 minutes, and most of the tour groups get off here. We’re talking full buses of people who’ve booked day tours that end at Arthur’s Pass. For everyone staying on the train, this is when the experience improves.
The viewing carriage, which was packed to its 20-person max from Christchurch, suddenly empties out. You can move around without elbowing people. You can actually breathe. This is the turning point.
Some passengers get off to hike and catch the return train later, but you’d need to time it carefully. We didn’t do this because we wanted the full train experience, but it’s an option if you’re into hiking.
Arthur’s Pass to Otira Tunnel (Into Another World)
After Arthur’s Pass, the landscape shifts. The mountains press in closer, the air gets cooler, and you can feel the change. You’re moving from the dry eastern side of the Southern Alps to the wet, wild West Coast.
Then comes the Otira Tunnel. It’s 8.5 kilometres long, and for about 10 minutes, you’re in complete darkness. We used this time to eat the lunch we’d packed from Christchurch: Veggie Wrap, snacks, and fruit. Saved us about NZD 20 each.
When the train bursts out into sunlight over the West Coast valleys, it clicks. You can’t drive through this part of New Zealand. You can only see it from here.
Otira to Moana (The Wild West Coast)
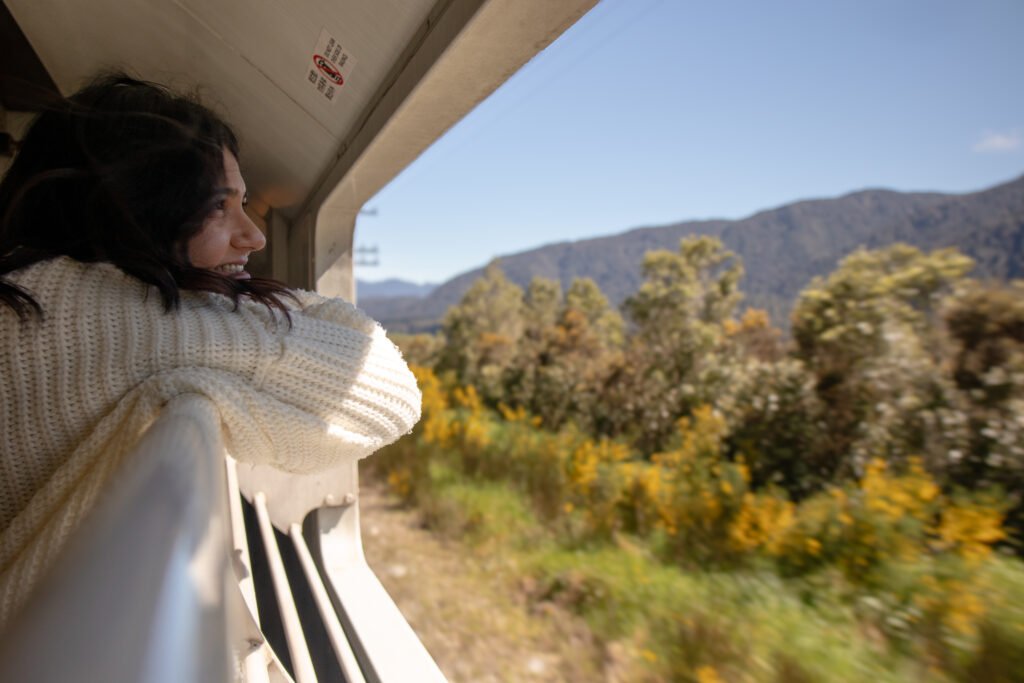
From Otira, the train glides through river valleys and native forest. The landscape is lush, green, and remote. You’ll pass small towns like Moana, which sits beside Lake Brunner, a mirror of the surrounding hills. The train slows through some sections, and the curves give you those classic shots where you can see the entire length of the train snaking through the valleys.
Two spots to watch for: Jacksons and Inchbonnie. These are the best curve-shot locations on the route. Keep your camera ready. The sections go by fast, and if you miss them on the way out, you’ll get another chance on the return journey.
Moana to Greymouth (Final Stretch)
The final stretch into Greymouth is quieter. The train descends further, the valleys widen, and you start to feel the Tasman Sea getting closer even before you see it. The landscape softens slightly, still green and wild, but less dramatic than the alpine sections.
You’ll arrive in Greymouth around 1:15 p.m. The town is small, quiet, and honestly, not much to look at. But that’s fine. You’re not here for Greymouth. You just spent four and a half hours crossing some of the best terrain in New Zealand, and now you have an hour to stretch your legs before doing it all over again.
Ready to experience the TranzAlpine? Book your tickets here.
One-Way or RetOne-Way vs Return: What Makes Sense for Youurn?
The 1 Hour in Greymouth: What to Do
You get about an hour in Greymouth before the return train leaves. The town is small and quiet, especially midweek, and there’s honestly not much to see.
Your options: grab a quick coffee at one of the cafés near the station, or take a short walk to the Grey River (about 5 minutes). We did a brief stroll, but we didn’t feel like we were missing anything by keeping it short.
If you’re continuing down the West Coast instead of taking the return train, car rental desks and bus stops are right outside the station. It’s easy to pick up a car here and drive to Hokitika, Franz Josef, or further south.
Renting a car in Greymouth? Compare prices and book here.
For most people doing the return journey, don’t stress about what to do in Greymouth. You’re not here for the town. You’re here because you just crossed the Southern Alps on one of the world’s best train rides.
The Return Journey: Is It Worth Doing the Same Route Twice?
We weren’t sure if the return trip would feel repetitive. I thought it might get boring seeing the same landscapes twice in one day. Turns out, I was wrong.
The return journey was just as good as the first leg, and here’s why. The light is completely different. Morning light heading west is sharp and clear. Golden hour heading east is warm and soft. The same mountains, the same gorges, but the whole feel changes.
The train is also much quieter after Arthur’s Pass. On the way to Greymouth, the train was packed with tour groups. On the way back, most of those buses were gone, and we had entire carriages to ourselves. The viewing platform was empty. We could move around freely, take our time with photos, and just exist without feeling crowded.
We used the return journey to focus on those curve shots we missed the first time, Jacksons and Inchbonnie. We also spent time in the café carriage. Ordered a NZD 7.50 carrot cake and a NZD 13 bottle of Merlot. Maybe it was the wine, or maybe it was the golden light filtering through the Alps, but I genuinely enjoyed the return trip just as much as the first.
I’ve always loved train rides, that sense of sitting still while the world moves past you. For me, the return journey felt worth it. But if you’re wondering whether it’s the same for you, here’s the breakdown.
Do One-Way If:
You’re continuing down the West Coast to Hokitika, Franz Josef, or beyond. One-way makes sense if the train is just part of a bigger road trip. You can rent a car from Greymouth or hop on a bus, both are right outside the station.
You’re on a tight budget. Saving NZD 259 by skipping the return leg is significant, especially if you’re backpacking or watching your spending closely.
You’re short on time. Nine hours is a long day. If you only have a few days in the South Island, you might want to use that time actively exploring rather than sitting on a train twice.
You want variety. Train one way, drive back. It gives you flexibility and different perspectives on the landscape.
Planning to drive the West Coast after your train ride? Book your rental car here.
Do the Return If:
You want the full train experience. Seeing the route twice, in different light, with fewer people, is genuinely enjoyable if you love trains and don’t mind slow travel.
You’re based in Christchurch and don’t need to travel onward. If you’re staying in Christchurch and treating this as a day trip, the return makes sense.
You love golden hour. The evening light on the way back is stunning, and if you’re into photography, you’ll want that second pass through the Alps.
You’re not in a rush. If you have the time and the budget, the return journey doesn’t feel like a waste. It feels like a full experience.
Onboard Facilities & Practical Tips
The Café Carriage
The café serves coffee (NZD 5–7), tea, sandwiches, and hot meals (NZD 15–20). There’s also wine, beer, and non-alcoholic drinks. The food is decent, nothing fancy, but it’s fresh and does the job.
We packed our own lunch from Christchurch and saved about NZD 20–30 each. If you’re watching your budget, bring sandwiches, snacks, and a reusable water bottle. There’s no free water onboard, so BYO makes sense.
One heads-up: card machines can lose signal through the mountains. Bring NZD 20–30 cash just in case. We didn’t have issues, but other passengers did, and it’s better to be prepared.
Toilets
Toilets are in every carriage, and they were clean throughout our journey. No complaints.
Charging & Connectivity
There are USB charging ports at every seat, which is handy if you’re shooting a lot of photos or videos. There’s also a small screen in each carriage showing route maps, elevation, and commentary. It’s useful if you want context on what you’re seeing, but honestly, the views speak for themselves.
Mobile signal is patchy once you hit the mountains. If you want connectivity throughout your New Zealand trip, get an eSIM before you leave.
Staying connected in New Zealand? Get an eSIM here, so you have data even through the mountains. (Use the code SAGARAMI1GB to get 1 GB Global data for free)
Motion Sickness Tips
If you get motion sickness as I do, request a forward-facing seat when you book online. Seats are allocated at check-in, not when you book, so you also need to call ahead or remind staff when you check in.
If you forget, ask the train manager right after you board. They’ll move you if there’s availability. Sitting in the direction of travel makes a big difference; backward-facing seats on curves and through tunnels can be rough if you’re prone to nausea.
Bring medication if you need it. The train moves smoothly most of the time smoothly, but there are sections with sharp curves, and if you’re sensitive, you’ll feel it.
Weather & Seasonal Considerations
We travelled in November, which is spring in New Zealand. The mountains were still snow-dusted, wildflowers were starting to bloom, and there were fewer crowds than summer. It was a good time to go.
Winter (June to August) is dramatic. The Alps are fully snow-covered, and if you love winter landscapes, this is the best time. The downside is the viewing carriage is cold, and daylight is shorter, so you won’t get as much golden hour on the return.
Summer (December to February) is the busiest season. The valleys are lush and green, the days are longer, and you’ll get more time in good light. The downside is crowds. The downside is crowds. The train fills up fast, and you’ll be competing for space in the viewing carriage.
Weather matters. If the forecast shows heavy rain or thick cloud, visibility drops. The West Coast is naturally misty, which can look moody and atmospheric, but if it’s solid fog, you’ll spend four hours staring at nothing. Check MetService before you book, and if conditions look bad, consider rescheduling.
Check the weather forecast for Greymouth and Arthur’s Pass here
Best Photography Spots
If you’re serious about photography, here’s where to focus.
Staircase Viaduct: After Springfield, heading west. The train crosses a 73-meter-high steel bridge over the Waimakariri River Gorge. It’s narrow, dramatic, and one of the best shots on the route.
Waimakariri Gorge: Keep shooting through this entire section. The train snakes along the edge, and the light changes constantly.
Jacksons: Best curve shot heading west. The train bends through the valley, and you can see the entire length of the carriages against the mountains. Go fast, so keep your camera ready.
Inchbonnie: Works both directions. Another curve shot, slightly tighter than Jacksons, but just as good.
Open-air carriage: Anytime after Springfield. The viewing platform is the best spot for unobstructed shots, but it gets crowded between Christchurch and Arthur’s Pass. Wait until after Arthur’s Pass when it empties out.
If you miss shots on the way out, use the return journey to get them. The light is different, and you’ll have a second chance at the same locations. Ask train staff when you’re approaching key sections if you’re worried about timing
TranzAlpine vs Driving the West Coast: Which Is Better?
This depends on what you’re optimizing for.
Do the Train If:
You want train-only access. The Otira Tunnel, certain sections of the Waimakariri Gorge, and parts of the West Coast descent are only accessible by train. You can’t drive there. You can’t hike there.
You need a rest day. If you’ve been hiking, driving, or doing active adventures, nine hours on a train is a low-effort way to still see incredible landscapes.
You’re short on time and can’t drive the full West Coast. The train gives you a condensed version of the South Island’s best terrain in under five hours.
Weather or driving conditions are bad. If it’s winter and you’re not confident on mountain roads, the train is safer and less stressful.
Drive Instead If:
You’re already doing the West Coast road trip. If you’re driving from Greymouth to Franz Josef, Haast, and beyond, you’ll see similar landscapes, rainforest, river valleys, and mountain views. The train gives you access to a few sections you can’t drive, but if you’re doing the full coastal route anyway, that’s not enough to justify NZD 518.
You want flexibility. Driving means you can stop wherever you want, pull over for photos, explore random beaches, and hike short trails. The train locks you into a schedule.
You’re on a tight budget. Renting a car and splitting petrol costs with travel companions is cheaper than train tickets, especially if you’re travelling as a couple or group.
You have 3+ days to explore the region. If you have time, driving lets you see more and go deeper into places the train just passes through.
Best of Both:
Train from Christchurch to Greymouth, rent a car in Greymouth, and drive the West Coast to Queenstown. You get the train experience and the road trip flexibility. It’s the most expensive option, but if budget isn’t an issue, it’s the best way to see everything.
Doing both? Book your one-way rental from Greymouth here.
Booking Tips & How to Save Money
How to Book
Book directly through the Great Journeys of New Zealand website or compare prices on Klook. Seats are allocated at check-in, not when you book online, so you can’t choose your exact seat in advance.
Book directly here or compare prices and book on klook here.
Request seat preferences at check-in. The right-hand side is better heading from Christchurch to Greymouth. Forward-facing seats matter if you get motion sickness. Arrive at least 15 minutes early to increase your chances of getting what you want.
If you’re travelling in summer (December to February), book at least 2–3 weeks in advance. The train fills up fast, and last-minute bookings often mean you’ll get whatever seats are left.
Budget Traveler Tips
Bring your own food. We packed sandwiches, snacks, and fruit from Christchurch and saved about NZD 20–30 each. The café prices are fair, but if you’re watching spending, BYO makes sense.
Book Scenic, not Scenic Plus. You’ll save NZD 260+ per person one-way. The views are identical. You’re just paying for meal service and a quieter carriage, which isn’t worth it unless you really value luxury.
Consider one-way if you’re continuing onward. Save NZD 259 by skipping the return and renting a car or taking a bus from Greymouth.
Bring a reusable water bottle. There’s no free water onboard, and buying bottled water adds up.
Bring a small amount of cash. Card machines can lose signal in the mountains, so having NZD 20–30 cash for the café avoids issues.
Arthur’s Pass Stopover Hack
You can disembark at Arthur’s Pass, hike for 3–5 hours, and catch the return train later. This only works if you time it carefully and check the schedule in advance. Most people don’t do this because the train itself is the experience, and you’ll see most of the best scenery from the windows anyway.
We didn’t do this because we wanted the full train journey both ways, but if you’re keen on hiking and want to break up the day, it’s technically an option.
Check Arthur’s Pass hiking trails here.
Combining the TranzAlpine with a West Coast Road Trip
Most people do: train to Greymouth, rent a car, drive to Hokitika, Franz Josef, Haast, Wanaka, Queenstown. It’s one of the best South Island itineraries because you get the train experience and the coastal drive without backtracking.
Car rental desks are right outside Greymouth station. Book one-way rentals in advance; they fill up fast in summer, and you don’t want to arrive with no options.
Rent a car in Greymouth and drop it off in Queenstown. Book here.
Suggested itinerary:
Day 1: TranzAlpine to Greymouth, drive to Hokitika (overnight)
Day 2–3: Franz Josef Glacier (heli-hike or guided walk)
Day 4-5: Drive to Wanaka via Haast Pass
Day 6-9: Wanaka to Queenstown
This gives you the best of both, the train and the road trip, without rushing.
Staying overnight in Hokitika? Find accommodation here.
So, Is the TranzAlpine Train Worth It? Final Verdict
Yes, the TranzAlpine is worth it, but not for everyone.
Do it if you’re visiting New Zealand for a short time, you want a rest day that still feels special, you love train journeys and slow travel, or you want access to landscapes you can’t reach by car. The Otira Tunnel, the Waimakariri Gorge, and parts of the West Coast descent. You can only see these from this train. That’s not marketing. That’s just geography.
Skip it if you’re already driving the West Coast, you’re on a tight budget and short on time, or you’d rather spend that money on active experiences like glacier hikes or Milford Sound. The TranzAlpine is beautiful, but it’s passive, and if you’re prioritising adventure over scenery, there are better ways to spend NZD 518.
Even though this was a sponsored trip, we’d still call it worth it. It’s not just transport. It’s a front-row seat to one of New Zealand’s best landscapes. Whether you do it one-way or return, Scenic or Scenic Plus, take a moment to sit back with a glass of wine and watch the Alps roll by. It’s a view that stays with you.
Ready to book your TranzAlpine journey? Check prices and availability here.
Planning more South Island adventures? Browse other experiences here.
Have you done the TranzAlpine? What was your experience? Drop a comment below.
Some links in this post are affiliate links, which means we may earn a small commission if you choose to buy through them, at no extra cost to you. This helps support our work and keep the blog running.